The video and step-by-step instructions will guide you on how to add and remove classes from your school’s XSEED Universal application
Step 1
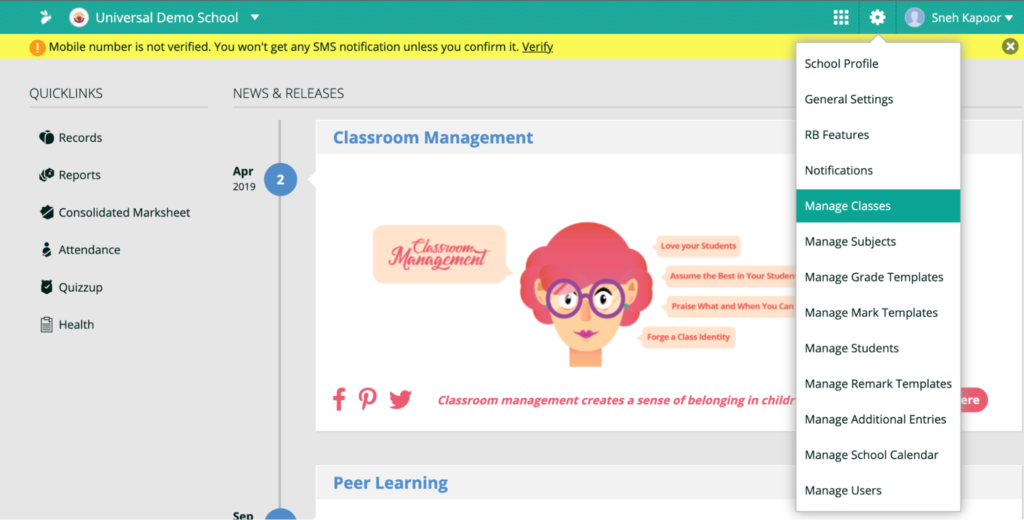
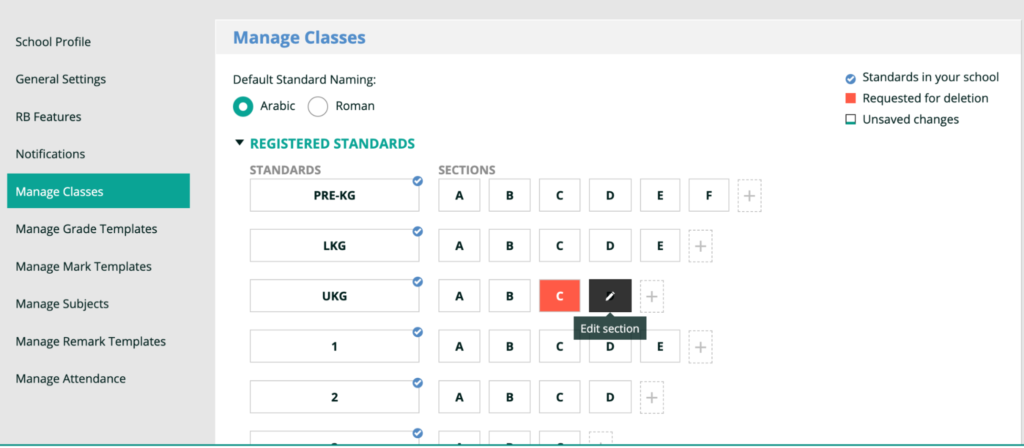
In the Student Information System, click on the “Manage Classes” module. This module manages the standards, and sections for each standard, applicable to your school. It comes pre-populated with the necessary set up for your school. However, you can edit the section or standard names, and add sections for any standard if you need.
Step 2
You can also change the standards from Arabic numerals, which is the default, to Roman numerals as needed.
Upon adding, the newly created section and standard will have a green bar beneath the box. This indicates that the changes have not been saved.
Step 3
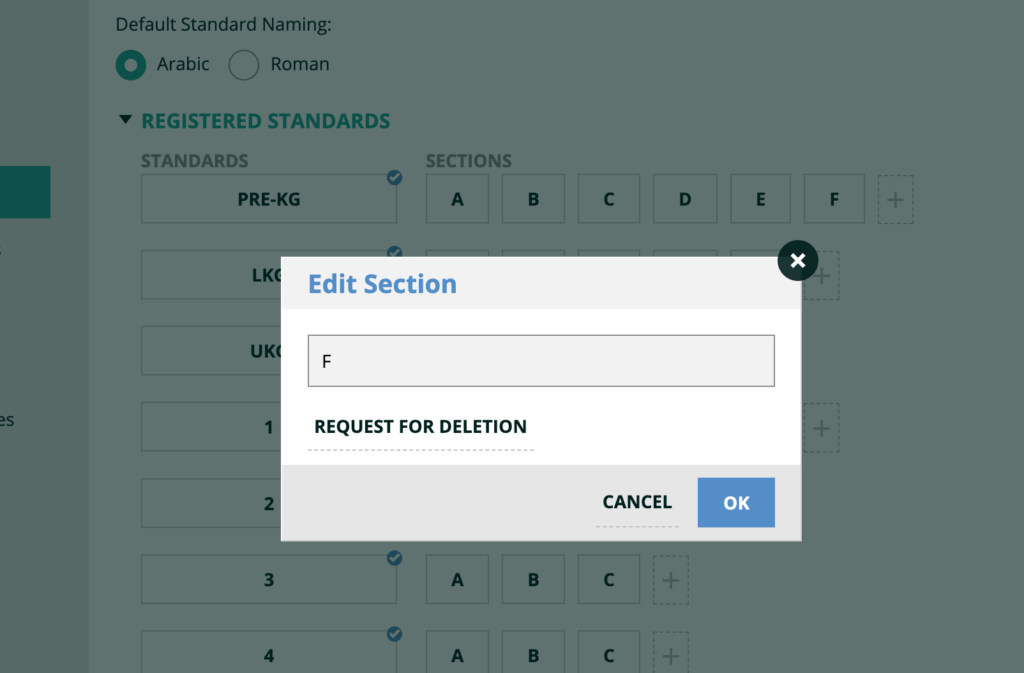
To delete sections, click on the desired standard or section and click on ‘Request for deletion’.
Click “Save” to save any changes you have made.
Step 4
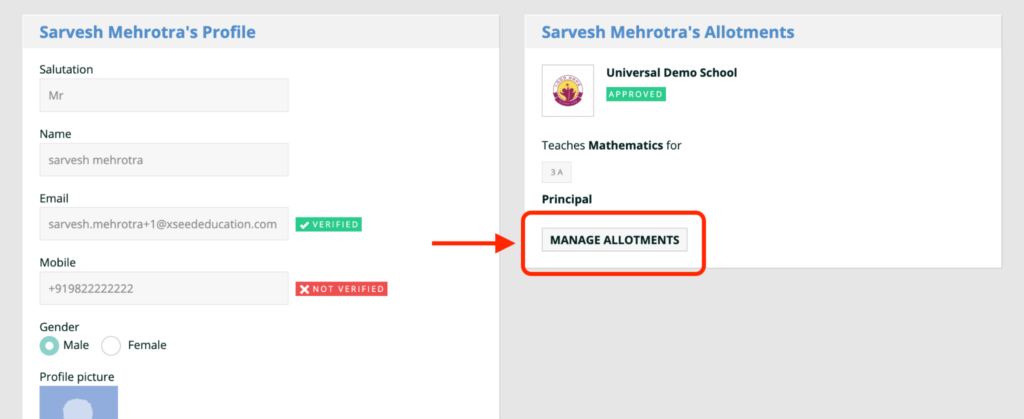
To assign specific subjects and grades to the newly added teacher, click on Manage Allotments, then click on Add new allotment, assign the desired allotment to the user and click on Create allotment at the bottom right of the page to save.
Step 5
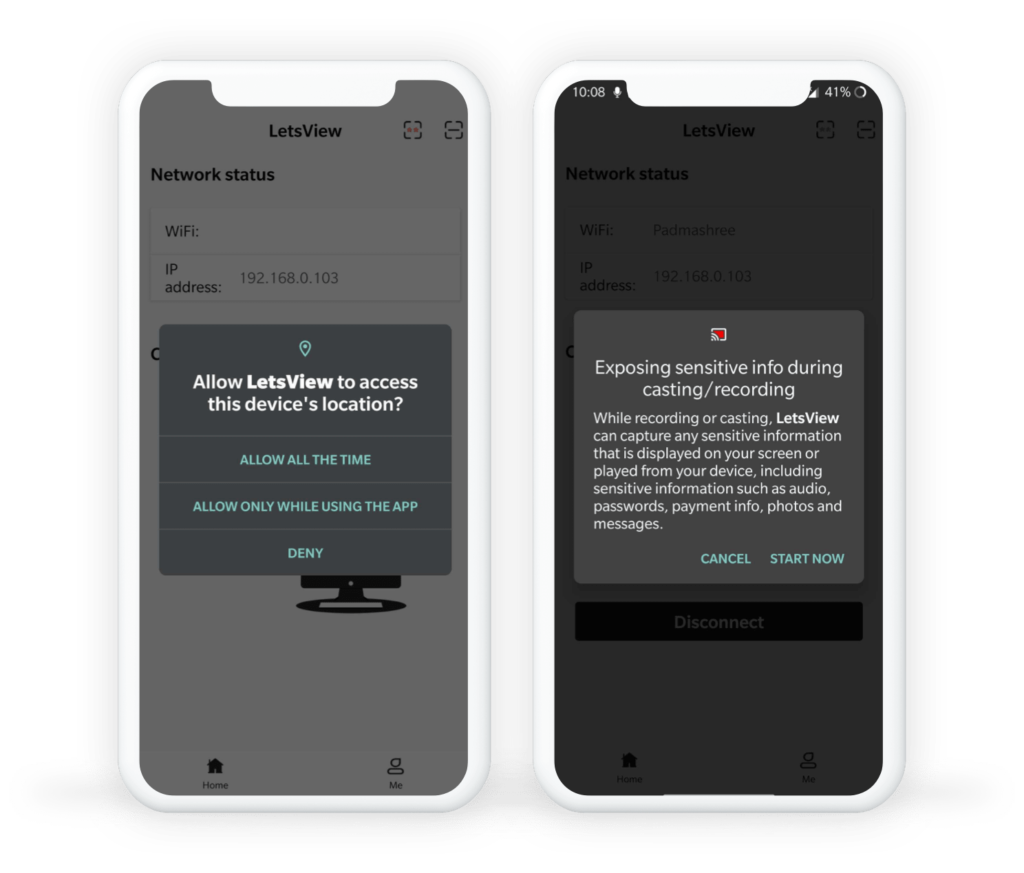
Click on the computer name.
Allow permission to record audio.
Click on the Start Now button.
Step 6
Your mobile screen should be visible in the LetsView application on your computer. You can share that same window over screen sharing in any video conferencing platform (e.g., Zoom, Google Meet, or MS Teams). Don’t forget to also share computer sound!
Please note: Sometimes the window with the mobile screen will appear behind the LetsView application. Minimize the LetsView window to find it.